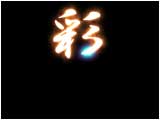
"Final Render"
QuicktimeMovie
(237 KB)
Example.17: Writes a Character like Penmanship
(AE5.5 PRO)

AE-TIPS 17 : Adobe After Effects CS5 (10.0.2.4)
Resolution: 640x480
Third-Party AE Plugins:
- No Use
Third-Party Footages:

- Artbeats Reel Fire RF201


Creating the Gradation Material

Although there are various the expression techniques of "Writing Effect"
It is introduced The method which used "Gradient Wipe".
Since it is a quite advanced technique, please understand.

Use "Blend Tool" of Illustrator.
Create the Gradation which order of a writing character.

View Screen Shot
"Adobe Illustrator"


"Wipe Animation"
QuicktimeMovie
(35 KB)


Gradient Wipe

Put The gradation Material of STEP1 into a New Composition.
Turn Off the eyeball icon.(Layer Invisible)
Create a White New Solid.
Apply Effect > Transition > Gradient Wipe.
Adjust the parameter.

View Effect Controls Window
"Gradient Wipe"


"Glow"
QuicktimeMovie
(32 KB)


Glow Effect

Apply Glow to the tip portion of a character.
Put The Material of STEP2 into a New Composition.
Duplicate the Layer and Shift Position "1 Frame"
Make only a tip portion using "Track Matte"

Create an adjustment Layer.
Apply Effect > Stylize > Glow.

* The usage of "Arbitrary map"
Please refer to the manual of Photoshop.

View Effect Controls Window
"Glow"


"Composite"
QuicktimeMovie
(75 KB)


Composite

composite The Material of STEP2 and STEP3.

Attach "Flame" as a dessert.
Put the Material of STEP2 into this Composition.
Apply Effect > Stylize > Glow.
Put the Flame Stock Footage into this Composition.
Apply Track Matte.


"Final Render"
QuicktimeMovie
(237 KB)


Completion

Prepare A background Material.
It will complete if you composite the Background and STEP4.
Although Apply scale animation this time.
You may use "3D Layer Function"

The advantage of "Writing Effect" which used Gradient Wipe,
It is "A blot is possible" and "speed adjustment is easy"
Try other methods, in order to understand a difference.

More information about "Artbeats Reel Fire"
http://www.artbeats.com/